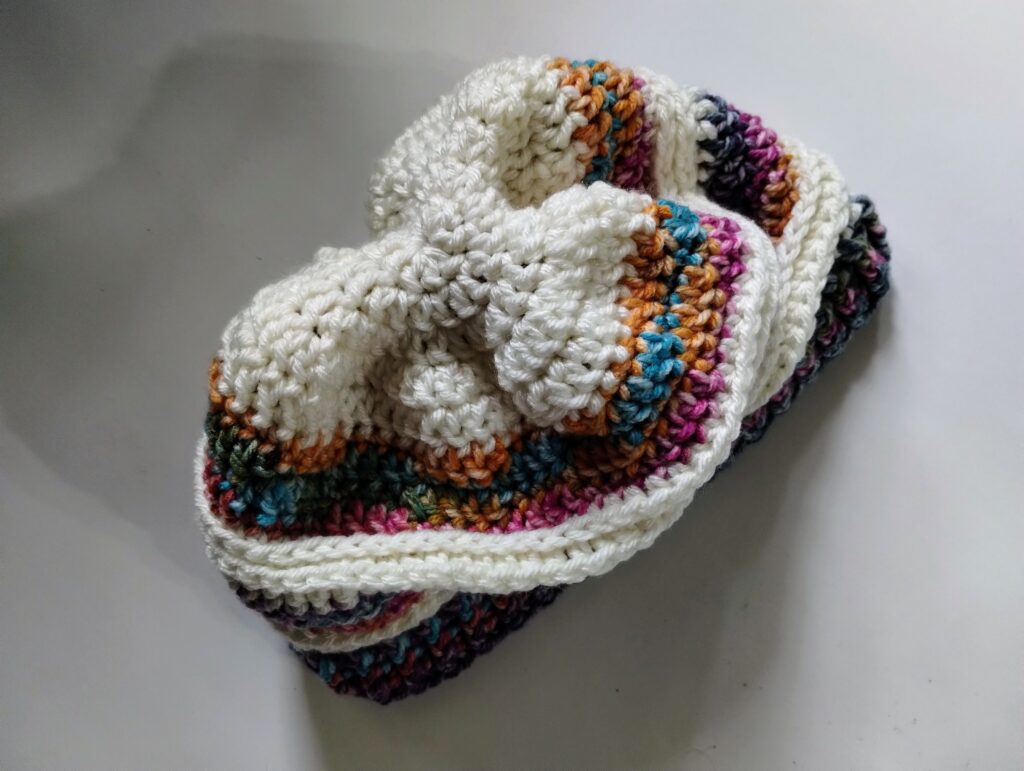
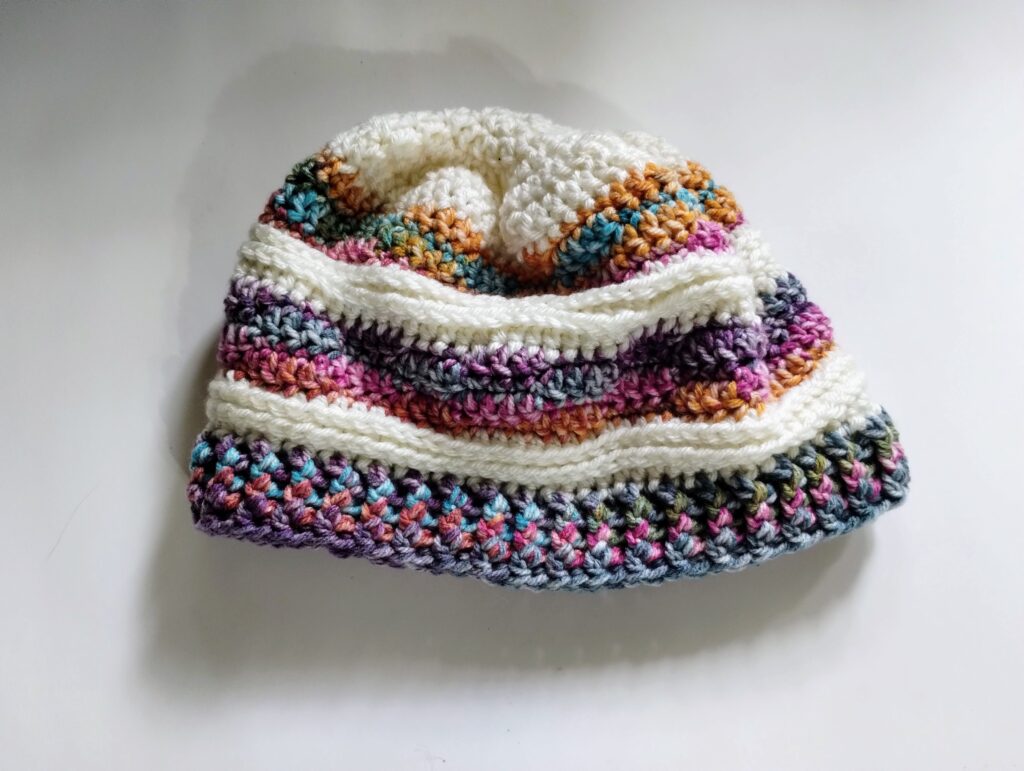
My son loves math with a passion. He found out it’s possible to create something called a “hyperbolic surface” with crochet. (Don’t worry, you need no special math skills for this pattern!) I told him I knew how to do that, and he asked for a beanie with a hyperbolic surface. I incorporated it into the crown of this hat, which has more increases than are used for a flat disk, making it ruffle a bit. I don’t know whether this pattern would pass muster with a mathematician, but my son loves it!
This pattern is written for two colors. Color A is the color of the crown and of the textured stripes, and I recommend using a solid color to bring out the textures. Color B is the color of the ribbed brim and of the other stripes, and a variegated or self-striping yarn would look especially striking because of the alternating single crochet/double crochet pattern of those stripes. You can also work this beanie in a single color if you prefer.
This hat is sized for an average adult. To adjust the size, you can use a larger it smaller hook.
The name of this pattern comes from the name of a pioneer in the study of hyperbolic surfaces, Nikolai Lobachevsky.
Notes
The chains at the start of a round do not count as a stitch. Slip stitches are never counted.
This pattern uses standing stitches to start rounds with a new color. I love standing stitches because they don’t require an unsightly chain to raise them up. Mrs. Micawber has a great photo tutorial here. However, you can instead attach the yarn using a conventional chain if you prefer.
The textured stripes (in color A) use stitches worked in the third loop of the previous round of half double crochets. When working in rounds like in this pattern, the third loop is located behind the stitch, just under the two main loops at the top. Tamara Kelly of Moogly Blog has some nice photos showing the third loop of a half double crochet stitch.
The brim of the hat uses ribbing made from front post and back post double crochet stitches. Jennifer Renaud of A Crocheted Simplicity has an excellent photo tutorial for front post double crochet stitches here. Maisie and Ruth: Pretty Simple Crochet has a great photo tutorial for back post double crochet stitches here.
Materials
- Worsted/aran (#4) weight yarn, about 75-90 yd. (69-82 m) for color A and 100-120 yd. (91-110 m) for color B
- 5.5 mm (size I-9) crochet hook
- Yarn needle
Special Stitches
- Back post double crochet: Insert hook from back to front around the post of the stitch one row below, yarn over and work a double crochet.
- Front post double crochet: Insert hook from front to back around the post of the stitch one row below, yarn over and work a double crochet.
- Standing double crochet: Place yarn over hook so the end is in front, wrap end around yarn to behind (1 loop on hook), yarn over and perform a double crochet in the indicated stitch.
- Standing half double crochet: Place yarn over hook so the end is in front, wrap end around yarn to behind (1 loop on hook), yarn over and perform a half double crochet in the indicated stitch.
- Standing single crochet: Place yarn over hook so the end is in front, wrap end around yarn to behind (1 loop on hook), perform a single crochet in the indicated stitch.
Abbreviations
- bpdc: back post double crochet
- ch: chain
- dc: double crochet
- ea: each
- fpdc: front post double crochet
- hdc: half double crochet
- MR: magic ring
- sc: single crochet
- sl st: slip stitch
- st: stitch
Instructions
Round 1: in color A, in a MR, ch 2, dc 10, sl st to first st. (10)
Round 2: ch 2, 2 dc in ea st around, sl st to first st. (20)
Round 3: ch 2, 2 dc in ea st around, sl st to first st. (40)
Round 4: ch 2, 2 dc in ea st around, sl st to first st. (80)
Round 5: ch 2, dc in ea st around, sl st to first st, cut color A and finish off. (80)
The diameter should be about 5.5 inches (14 cm).
Round 6: in color B, standing sc in first st of Round 5, sc 3, dc 4, *sc 4, dc 4*, repeat from * to * around, sl st to first st. (80)
Round 7: ch 2, starting in same st, *dc 4, sc 4*, repeat from * to * around, sl st to first st. (80)
Round 8: ch 1, *sc 4, dc 4*, repeat from * to * around, sl st to first st. (80)
Round 9: repeat round 7, cut color B and finish off. (80)
Round 10: in color A, standing hdc in first st of Round 9, hdc in ea st around, sl st to first st. (80)
Round 11: ch 2, hdc in 3rd loop of ea st around, sl st to first st. (80)
Round 12: repeat round 11, cut color A and finish off. (80)
Rounds 13-19: repeat Rounds 6-12.
Round 20: in color B, standing dc in first st of Round 19, dc in ea st around, sl st to first st. (80)
Round 21: ch 2, fpdc around first st, bpdc around next st, *fpdc, bpdc*, repeat from * to * around, sl st to first st. (80)
Rounds 22-23: repeat Round 21.
Cut yarn and finished off. Weave in all ends.